Prime Collaboration Assurance Migration van 11.x tot 12.1
Downloadopties
Inclusief taalgebruik
De documentatie van dit product is waar mogelijk geschreven met inclusief taalgebruik. Inclusief taalgebruik wordt in deze documentatie gedefinieerd als taal die geen discriminatie op basis van leeftijd, handicap, gender, etniciteit, seksuele oriëntatie, sociaaleconomische status of combinaties hiervan weerspiegelt. In deze documentatie kunnen uitzonderingen voorkomen vanwege bewoordingen die in de gebruikersinterfaces van de productsoftware zijn gecodeerd, die op het taalgebruik in de RFP-documentatie zijn gebaseerd of die worden gebruikt in een product van een externe partij waarnaar wordt verwezen. Lees meer over hoe Cisco gebruikmaakt van inclusief taalgebruik.
Over deze vertaling
Cisco heeft dit document vertaald via een combinatie van machine- en menselijke technologie om onze gebruikers wereldwijd ondersteuningscontent te bieden in hun eigen taal. Houd er rekening mee dat zelfs de beste machinevertaling niet net zo nauwkeurig is als die van een professionele vertaler. Cisco Systems, Inc. is niet aansprakelijk voor de nauwkeurigheid van deze vertalingen en raadt aan altijd het oorspronkelijke Engelstalige document (link) te raadplegen.
Inhoud
Inleiding
In dit artikel wordt de procedure voor de overgang van Prime Collaboration Assurance (PCA) 11.x naar PCA 12.1 stap voor stap beschreven.
Voorwaarden
Vereisten
Cisco raadt kennis van de volgende onderwerpen aan:
- PCA 11.x in de ondersteunde migratieversies
- DMA-bestand (Data Migration Assistant) gedownload van Cisco Cloud Orchestrator (CCO) server
- Secure FTP (SFTP) server
Gebruikte componenten
De informatie in dit document is gebaseerd op de volgende software- en hardware-versies:
- PCA 12.1
- PCA 11.x
De informatie in dit document is gebaseerd op de apparaten in een specifieke laboratoriumomgeving. Alle apparaten die in dit document worden beschreven, hadden een opgeschoonde (standaard)configuratie. Als uw netwerk levend is, zorg er dan voor dat u de mogelijke impact van om het even welke opdracht begrijpt.
Configureren
Stap 1. Installeer het RPM-bestand
- Download het rpm bestand van de CCO-website. Dit bestand is vereist om de back-up op de PCA 11.x-server te genereren in een formaat dat leesbaar is voor het PCA 12.X-platform.
- Plaats het bestand onder/opt en controleer de bestandsintegriteit en controleer de md5sum.
Stem de md5sum af op de CCO-website:
-
Installeer het rpm bestand met behulp van deze opdracht:
rpm -ivh CSCOpca-dma-1,0-1,x86_64,rpm

- Zorg ervoor dat de rpm is geïnstalleerd:

Stap 2. Start de back-up op de 11.X server met het geïnstalleerde pakket
- Start dit script om de back-up te starten. U wordt gevraagd om parameters voor de SFTP-server zoals IP, Port Number, Gebruikersnaam, Pad.
./pcandma.sh
Opmerking: Het pad moet relatief zijn ten opzichte van het pad van de gebruikersdirectory. Als de gebruikersmap bijvoorbeeld USER1 is, moet u een map onder deze map maken, die het pad is waarlangs de back-up wordt geplaatst.
/USER1/PCA/pca
pso is de hostname van de server ( de back-up wordt hier geselecteerd ) .
PCA is de weg die werd genoemd.

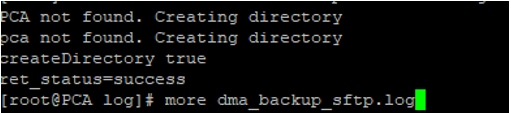
- Het script controleert of de doelmap aanwezig is. Als dit niet het geval is, maakt het de map aan.

- Als de folder niet bestaat, creëert PCA automatisch één:
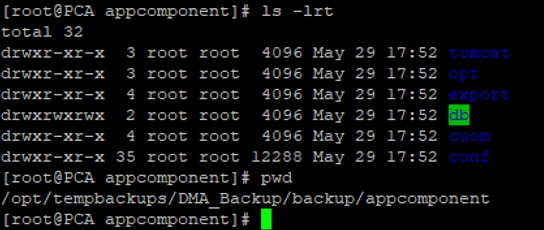
- De back-up wordt opgeslagen op de lokale server op het pad/opt/tempback-up/DMA_Backup/Backup/appcomponent voordat deze wordt overgeheveld naar de SFTP-server.
- Nadat de back-up van DMA is voltooid, wordt het bestand in de SFTP-server in de doelmap geplaatst.

- Mogelijk ziet u enige vertraging bij het starten van de services. U ziet een aantal logbestanden als volgt:
Aanbevolen wordt om te wachten tot alle services binnen zijn.

Stap 3. Gebruik DMA om gegevens te migreren naar PCA 12.X
- U moet de extra ES-pleister (Engineering Special) installeren om de optie Ingeschakeld te krijgen voor DMA-herstel in PCA 12.1.
De DMA optie is beschikbaar vanaf ES1.
Het wordt aanbevolen om de laatste ES-pleister te installeren voordat u de DMA start.
U kunt het leesmij-bestand voor de ES lezen voordat u de DMA start.
- Specificeer de SFTP serverdetails zoals hier weergegeven. Controleer de SFTP-connectiviteit.
Opmerking: Het pad moet relatief zijn ten opzichte van het pad van de gebruikersdirectory.
Als de gebruikersmap USER1 is.
pso is de hostname van de server ( de back-up wordt hier geselecteerd ) .
PCA is het pad dat werd genoemd toen de DMA back-up werd gegenereerd.

- Zodra het DMA-proces is begonnen, kunt u de logbestanden met het gebruik van het View DMA Log controleren op het DMA-scherm.

- Als je het DMA-proces runt, kan de GUI uitloggen. Als u opnieuw inlogt, wordt deze gericht op een nieuwe DMA-pagina.
Als u de details invoert en DMA opnieuw draait, wordt u gevraagd met de status dat de DMA al actief is.
- U kunt ook het statuslogbestand van de CLI controleren met behulp van het logbestand logbestand.
Dit bestand wordt aan het einde van de DMA-bewerking verwijderd.
U kunt ook controleren vanuit de optie DMA-logbestand bekijken in de GUI zelf.

- DMA is een 20 stappen-proces. Aan het eind van deze 20 stappen zullen de diensten opnieuw worden gestart.
Nadat de serviceherstart is voltooid, herlaadt de VM opnieuw. U verliest de controle aan CLI en GUI tot de herstart is voltooid.
Controleer de servicestatus op de servicepagina zodra de VM is herstart.
Wacht tot alle service is aangekomen.
Verifiëren
Gebruik dit gedeelte om te bevestigen dat de configuratie correct werkt.
Nadat alle services actief zijn, kunt u inloggen om uw gegevens te valideren in de OCR-indeling.
Problemen oplossen
Deze sectie verschaft informatie die u kunt gebruiken om problemen met uw configuratie op te lossen.
Aanmelden voor PCA 11.x:
- pcaninfra.log
- Analytics_dma.log => Voor back-up-analyse.
- betrouwbaarheidsverklaring_backup_dma.log => Voor back-up-conversie.
- dma_assurance_backup_file_tran.log => voor back-upbestandsoverdracht
- dma_backup_file_tran.log => voor analytische back-upbestandsoverdracht
- dma_backup_sftp.log
- dma_debug.log
- pcandma.log => wordt in sommige gevallen waargenomen dat de PCA-diensten enige tijd nodig hebben om de diensten weer te starten zodra het DMA-script draait.
Aanmelden bij PCA 12.x:
- pcandma.log => bevat gedetailleerde informatie over het herstellen en het bijwerken van de mislukking.
- analyse_dma.log
- assurance_backup_dma.log
- dma.log
- dma_assurance_Restore_file_tran.log
- dma_backup_file_tran.log
- dma_debug.log
- dma_status.log => dit bestand wordt verwijderd aan het einde van het DMA-script.
Bijgedragen door Cisco-engineers
- Gautami Sinai NeurekarCisco TAC-ingenieur
 Feedback
Contact Cisco
- Een ondersteuningscase openen

- (Vereist een Cisco-servicecontract)