Intersight 연결을 위한 독립형 Nexus 구성 및 클레임
다운로드 옵션
편견 없는 언어
본 제품에 대한 문서 세트는 편견 없는 언어를 사용하기 위해 노력합니다. 본 설명서 세트의 목적상, 편견 없는 언어는 나이, 장애, 성별, 인종 정체성, 민족 정체성, 성적 지향성, 사회 경제적 지위 및 교차성에 기초한 차별을 의미하지 않는 언어로 정의됩니다. 제품 소프트웨어의 사용자 인터페이스에서 하드코딩된 언어, RFP 설명서에 기초한 언어 또는 참조된 서드파티 제품에서 사용하는 언어로 인해 설명서에 예외가 있을 수 있습니다. 시스코에서 어떤 방식으로 포용적인 언어를 사용하고 있는지 자세히 알아보세요.
이 번역에 관하여
Cisco는 전 세계 사용자에게 다양한 언어로 지원 콘텐츠를 제공하기 위해 기계 번역 기술과 수작업 번역을 병행하여 이 문서를 번역했습니다. 아무리 품질이 높은 기계 번역이라도 전문 번역가의 번역 결과물만큼 정확하지는 않습니다. Cisco Systems, Inc.는 이 같은 번역에 대해 어떠한 책임도 지지 않으며 항상 원본 영문 문서(링크 제공됨)를 참조할 것을 권장합니다.
목차
소개
이 문서에서는 향상된 Cisco TAC 지원을 위해 Intersight에서 독립형 Nexus 스위치를 활성화하고 클레임하는 데 필요한 단계를 설명합니다.
사전 요구 사항
Intersight.com에 계정이 있어야 합니다. Cisco NX-OS® 청구에는 라이센스가 필요하지 않습니다. 새 Intersight 어카운트를 만들어야 하는 경우 어카운트 생성을 참조하십시오.
요구 사항
다음 주제에 대한 지식을 보유하고 있으면 유용합니다.
독립형 Nexus 스위치에서 NXDC는 다음과 같은 지침과 제한 사항을 가지고 있습니다.
- Cisco NX-OS는 릴리스 10.2(3)F 이상을 실행해야 합니다.
- DNS는 적절한 VRF(Virtual Routing and Forwarding)에서 구성해야 합니다.
svc.intersight.com 포트 443에서 아웃바운드에서 시작된 HTTPS 연결을 허용해야 합니다. 이 항목은 및 컬로openssl 확인할 수 있습니다. ICMP(Internet Control Message Protocol) 요청은 무시됩니다.- 에 대한 HTTPS 연결에 프록시가 필요한 경우
svc.intersight.com NXDC(Nexus Switch Device Connector) 컨피그레이션에서 프록시를 구성할 수 있습니다. 프록시 컨피그레이션에 대해서는 NXDC 구성을 참조하십시오.
사용되는 구성 요소
사용되는 구성 요소이 문서의 정보는 다음 소프트웨어 및 하드웨어 버전을 기반으로 합니다.
- Cisco Nexus N9K-C93240YC-FX2
- Cisco NX-OS 10.3(4a)M
이 문서의 정보는 특정 랩 환경의 디바이스를 토대로 작성되었습니다. 이 문서에 사용된 모든 디바이스는 초기화된(기본) 컨피그레이션으로 시작되었습니다. 현재 네트워크가 작동 중인 경우 모든 명령의 잠재적인 영향을 미리 숙지하시기 바랍니다.
배경 정보
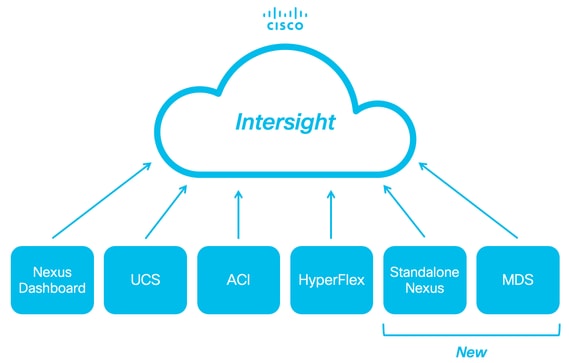
배경 정보Cisco Intersight는 고급 인프라, 워크로드 최적화 및 Kubernetes 서비스의 선택적 모듈형 기능으로 구성된 클라우드 운영 플랫폼입니다. 자세한 내용은 Intersight Overview를 참조하십시오.
디바이스는 각 시스템의 Cisco NX-OS 이미지에 포함된 NXDC를 통해 Intersight 포털에 연결됩니다. Cisco NX-OS 릴리스 10.2(3)F부터는 보안 인터넷 연결을 사용하여 연결된 디바이스에서 Cisco Intersight 포털에서 정보를 전송하고 제어 명령을 수신할 수 있는 안전한 방법을 제공하는 디바이스 커넥터 기능이 지원됩니다.
연결 이점
연결 이점Intersight 연결은 Cisco NX-OS 기반 플랫폼에 다음과 같은 기능과 이점을 제공합니다.
- 신속한 문제 해결(
show tech-support details열린 TAC 서비스 요청에 대한 RPR)을 통한 자동 수집 - 원격 온디맨드 수집
show tech-support details - 향후 제공될 기능은 다음과 같습니다.
- 텔레메트리 또는 하드웨어 장애를 기반으로 사전 대응적 TAC SR 열기
- 개별 show 명령 등의 원격 온디맨드 모음
빠른 시작 비디오
빠른 시작 비디오수동으로 NXOS 디바이스 클레임
수동으로 NXOS 디바이스 클레임연결 확인
연결 확인
       참고: Ping 응답은 억제됩니다(ICMP 패킷은 삭제됨).
       openssl
curl TLS(Transport Layer Security) 및 HTTPS 연결을 확인하려면 bash를 활성화하고 원하는 VRF(ip netns exec <VRF>)에서 및 명령을 실행하는 것이 좋습니다.
! Enable bash

config terminal ; feature bash ; end

! Verify TLS

run bash ip netns exec management openssl s_client -connect svc.intersight.com:443

! Verify https

run bash ip netns exec management curl -v -I -L -k https://svc.intersight.com:443

run bash ip netns exec management curl -v -I -L -k https://svc.intersight.com:443  --proxy [protocol://]host[:port]
OpenSSL 클라이언트를 사용한 TLS 확인
OpenSSL 클라이언트를 사용한 TLS 확인OpenSSL을 사용하여 의 TLS 연결을 확인할 수 svc.intersight.com:443 있습니다. 성공하면 서버에서 공용 서명 인증서를 검색하고 인증 기관 체인을 표시합니다.
참고: 다음 예에서는 VRF 관리에서openssl s_client 명령을 실행합니다. 구성에서 원하는 를 ip netns exec <VRF> 교체합니다.
Switch# run bash ip netns exec management openssl s_client -connect svc.intersight.com:443 CONNECTED(00000004) depth=2 C = US, O = Amazon, CN = Amazon Root CA 1 verify return:1 depth=1 C = US, O = Amazon, CN = Amazon RSA 2048 M01 verify return:1 depth=0 CN = us-east-1.intersight.com verify return:1 --- Certificate chain 0 s:CN = us-east-1.intersight.com i:C = US, O = Amazon, CN = Amazon RSA 2048 M01 1 s:C = US, O = Amazon, CN = Amazon RSA 2048 M01 i:C = US, O = Amazon, CN = Amazon Root CA 1 2 s:C = US, O = Amazon, CN = Amazon Root CA 1 i:C = US, ST = Arizona, L = Scottsdale, O = "Starfield Technologies, Inc.", CN = Starfield Services Root Certificate Authority - G2 3 s:C = US, ST = Arizona, L = Scottsdale, O = "Starfield Technologies, Inc.", CN = Starfield Services Root Certificate Authority - G2 i:C = US, O = "Starfield Technologies, Inc.", OU = Starfield Class 2 Certification Authority --- Server certificate -----BEGIN CERTIFICATE----- MIIGfzCCBWegAwIBAgIQD859tBjpT+QUyVOXqkG2pzANBgkqhkiG9w0BAQsFADA8 MoKXXrXrkESkWgbQadlEo3H545Zsix+mu83r7Gmv5L3+WFKzfUmLgeB2+z1Dk0Kg UlNBIDIwNDggTTAxMB4XDTIzMDQwNTAwMDAwMFoXDTI0MDUwMzIzNTk1OVowIzEh MB8GA1UEAxMYdXMtZWFzdC0xLmludGVyc2lnaHQuY29tMIIBIjANBgkqhkiG9w0B AoKXXrXrkESkWgbQadlEo3H545Zsix+mu83r7Gmv5L3+WFKzfUmLgeB2+z1Dk0Kn BDM+MCNnvmgNDlGnU6/t1jOC780QpKXr2ksbGC0FzHfMvNjEk9kMCUe179dummrs pOOFzvIrJGqYvkIXT5WLtiU9aP3+VSEWQO1kTeDHoDfLLJLON42cKjskYt0jCTwE poKXXrXrkESkWgbQadlEo3H545Zsix+mu83r7Gmv5L3+WFKzfUmLgeB2+z1Dk0KI elf3tYBhuQK3y4DoSqg1/gptnUOlNwSqMu4zXjI7neGyHnzjsPUyI8qilXbPS9tV KoKXXrXrkESkWgbQadlEo3H545Zsix+mu83r7Gmv5L3+WFKzfUmLgeB2+z1Dk0Kw HwYDVR0jBBgwFoAUgbgOY4qJEhjl+js7UJWf5uWQE4UwHQYDVR0OBBYEFM7X7s7c NoKXXrXrkESkWgbQadlEo3H545Zsix+mu83r7Gmv5L3+WFKzfUmLgeB2+z1Dk0Kp Z2h0LmNvbYIac3ZjLXN0YXRpYzEuaW50ZXJzaWdodC5jb22CGioudXMtZWFzdC0x LoKXXrXrkESkWgbQadlEo3H545Zsix+mu83r7Gmv5L3+WFKzfUmLgeB2+z1Dk0K1 Y3MtY29ubmVjdC5jb22CE3N2Yy51Y3MtY29ubmVjdC5jb22CDmludGVyc2lnaHQu Y29tghJzdmMuaW50ZXJzaWdodC5jb20wDgYDVR0PAQH/BAQDAgWgMB0GA1UdJQQW MBQGCCsGAQUFBwMBBggrBgEFBQcDAjA7BgNVHR8ENDAyMDCgLqAshipodHRwOi8v YoKXXrXrkESkWgbQadlEo3H545Zsix+mu83r7Gmv5L3+WFKzfUmLgeB2+z1Dk0KI BgZngQwBAgEwdQYIKwYBBQUHAQEEaTBnMC0GCCsGAQUFBzABhiFodHRwOi8vb2Nz coKXXrXrkESkWgbQadlEo3H545Zsix+mu83r7Gmv5L3+WFKzfUmLgeB2+z1Dk0Ku cjJtMDEuYW1hem9udHJ1c3QuY29tL3IybTAxLmNlcjAMBgNVHRMBAf8EAjAAMIIB fgYKKwYBBAHWeQIEAgSCAW4EggFqAWgAdwDuzdBk1dsazsVct520zROiModGfLzs 3oKXXrXrkESkWgbQadlEo3H545Zsix+mu83r7Gmv5L3+WFKzfUmLgeB2+z1Dk0K5 CSFqTpBjlOdOLQ4YuQIhAO10VDrLJMM+9EtOwmZd8Q1MRHJlOlr2VWmOTF6GGkCV AHUAc9meiRtMlnigIH1HneayxhzQUV5xGSqMa4AQesF3crUAAAGHUp9iOwAABAMA RjBEAiAFPPLvt7TN7mTRnQZ+FZLGR/G04KQqSjYuszDNPArT3wIgf/sQbQqNjCk7 joFUuL9cEPYfNm7n1nZIFIRAK6UqwG0AdgBIsONr2qZHNA/lagL6nTDrHFIBy1bd LoKXXrXrkESkWgbQadlEo3H545Zsix+mu83r7Gmv5L3+WFKzfUmLgeB2+z1Dk0K8 MXtts5t/C5lYw5peGAIgK0eFmxTptEfMkBZti39vepUxb5meDvKaZdtXVvFpkCMw DQYJKoZIhvcNAQELBQADggEBANl6HKZ9P6AIufr7qdNCcW+DXClY6dqX1KN0sCh+ UoKXXrXrkESkWgbQadlEo3H545Zsix+mu83r7Gmv5L3+WFKzfUmLgeB2+z1Dk0KM z5R1VV+81gN2HHiuUsEOFwHDbbhiGBJiJteFm0blpruKHennx8HQYfC7bup4N5JH YoKXXrXrkESkWgbQadlEo3H545Zsix+mu83r7Gmv5L3+WFKzfUmLgeB2+z1Dk0Kb LKFl6c+EN0Y76YaCV8doujG3qD/bO9VDx7dhvbSEECYuzbYyPDGnb7Drmhny0Eki smLUZ3TVcCvPc+1dE/jrbBzPeIY7jGr8eL7masFCuZZn2lM= -----END CERTIFICATE----- subject=CN = us-east-1.intersight.com issuer=C = US, O = Amazon, CN = Amazon RSA 2048 M01 --- No client certificate CA names sent Peer signing digest: SHA256 Peer signature type: RSA Server Temp Key: ECDH, P-256, 256 bits --- SSL handshake has read 5754 bytes and written 442 bytes Verification: OK --- New, TLSv1.2, Cipher is ECDHE-RSA-AES128-GCM-SHA256 Server public key is 2048 bit Secure Renegotiation IS supported Compression: NONE Expansion: NONE No ALPN negotiated SSL-Session: Protocol : TLSv1.2 Cipher : ECDHE-RSA-AES128-GCM-SHA256 Session-ID: 66D0B69FAA7EB69FAA7EC54C9764966ED9A1289650B69FAA7EB69FAA7E9A5FD5ADE Session-ID-ctx: Master-Key: B69FAA7E45891555D83DFCAEB69FAA7EB69FAA7EA3A99E7689ACFB69FAA7EAD7FD93DB69FAA7EB1AF821 PSK identity: None PSK identity hint: None SRP username: None TLS session ticket lifetime hint: 86400 (seconds) TLS session ticket: 0000 - 36 12 b2 36 b3 53 07 29-54 ac 56 f0 06 83 4f b1 6..6.S.)T.V...O. 0010 - 49 35 51 40 22 07 bd 7e-59 d7 7e 44 29 ff c6 2a I5Q@"..~Y.~D)..* 0020 - ec bc 11 e1 d3 5d 69 e8-7a d2 f1 c2 08 f6 5b 8f .....]i.z.....[. 0030 - 2c 5b 5e 50 e3 e2 8f e7-c4 44 8f e4 6d 45 d2 64 ,[^P.....D..mE.d 0040 - 93 98 f5 e8 b0 f7 1d 00-26 4b 88 ea 2d 7d 42 58 ........&K..-}BX 0050 - 05 9f 71 3a fe ac f0 15-a5 5c 1d 74 74 bf 32 1b ..q:.....\.tt.2. 0060 - d8 a8 23 84 08 cc f9 3e-54 ..#....>T Start Time: 1707515659 Timeout : 7200 (sec) Verify return code: 0 (ok) Extended master secret: yes --- HTTPS 연결 가능성 확인
HTTPS 연결 가능성 확인HTTPS 연결을 확인하려면 와 함께 curl 명령을 사용합니다(-v verbose flag프록시 사용 여부 표시).
참고: 프록시 활성화 또는 비활성화의 영향을 확인하려면 또는 옵션을 추가할 수 --proxy [protocol://]host[:port] 있습니다--noproxy [protocol://]host[:port].
이 구성ip netns exec <VRF>은 원하는 VRF에서 컬(curl)을 실행하는 데 사용됩니다(예: VRF 관리를 위해ip netns exec management).
run bash ip netns exec management curl -v -I -L -k https://svc.intersight.com:443

run bash ip netns exec management curl -v -I -L -k https://svc.intersight.com:443  --proxy [protocol://]host[:port]
 # run bash ip netns exec management curl -v -I -L -X POST https://svc.intersight.com:443 --proxy http://proxy.esl.cisco.com:80
Trying 10.201.255.40:80...
* Connected to proxy.esl.cisco.com (10.201.255.40) port 80 * CONNECT tunnel: HTTP/1.1 negotiated
* allocate connect buffer
* Establish HTTP proxy tunnel to svc.intersight.com:443
> CONNECT svc.intersight.com:443 HTTP/1.1
> Host: svc.intersight.com:443
> User-Agent: curl/8.4.0
> Proxy-Connection: Keep-Alive
>
< HTTP/1.1 200 Connection established HTTP/1.1 200 Connection established
< snip >
구성
구성내 장치 클레임 intersight.com
내 장치 클레임 intersight.comIntersight에서 새 대상을 요청하려면 다음 단계를 수행합니다.
Nexus 디바이스에서
Nexus 디바이스에서Cisco NX-OS 명령을 실행합니다show system device-connector claim-info.
참고: NX-OS 10.3(4a) 이전 릴리스의 경우 "show intersight claim-info" 명령을 사용합니다.
       참고: Nexus에서 생성한 클레임 정보는 다음 Intersight 클레임 필드에 매핑됩니다.
       일련 번호 = Intersight Claim ID
       Device-ID Security Token = Intersight 클레임 코드
# show system device-connector claim-info
SerialNumber: FDO23021ZUJ
SecurityToken: 9FFD4FA94DCD
Duration: 599
Message:
Claim state: Not Claimed
여기에 보고된 기간은 초 단위입니다.
Intersight 포털에서
1. 10분 이내에 Intersight에 계정 관리자, 장치 관리자 또는 장치 기술자 권한으로 로그인합니다.
2. 서비스 선택기 드롭다운 목록에서 시스템을 선택합니다.

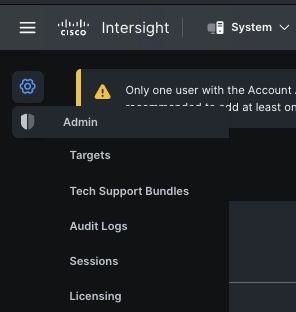
3. 로 ADMIN > Targets > Claim a New Target 이동합니다.
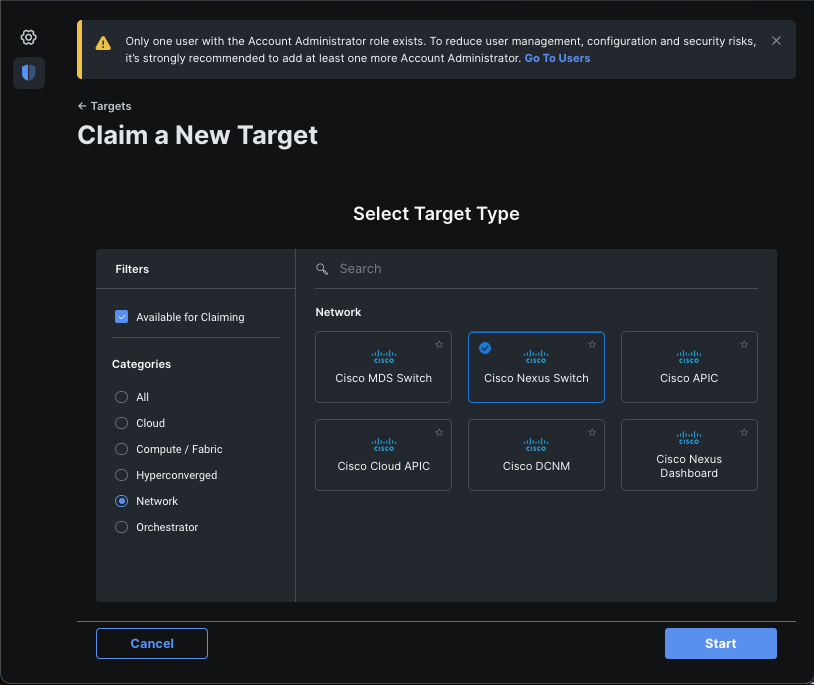
3.1. 이미지에 표시된 대로 Claim a New Target(새 대상 요청)을 클릭합니다.

4. 청구 가능을 선택하고 청구할 대상 유형(예: 네트워크)을 선택합니다. 시작을 클릭합니다.
5. 청구 프로세스를 완료하려면 필요한 상세내역을 입력하고 청구를 누릅니다.
참고: 스위치의 보안 토큰은 청구 코드로 사용되며 스위치의 일련 번호는 장치 ID입니다.
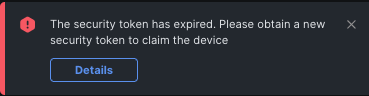
참고: 보안 토큰이 만료됩니다. 청구를 재생성하기 전에 완료해야 합니다. 그렇지 않으면 시스템에서 청구를 재생성하라는 메시지를 표시합니다.
Ansible을 사용하여 intersight.com에서 1대 다수의 독립형 Nexus 디바이스를 클레임합니다®
하나 이상의 Nexus 디바이스를 클레임하기 위해 Ansible 플레이북을 실행할 수 있습니다.
- Ansible 인벤토리 및 플레이북은 https://github.com/datacenter/ansible-intersight-nxos에서 Git 복제할 수 있습니다.
- Ansible에서
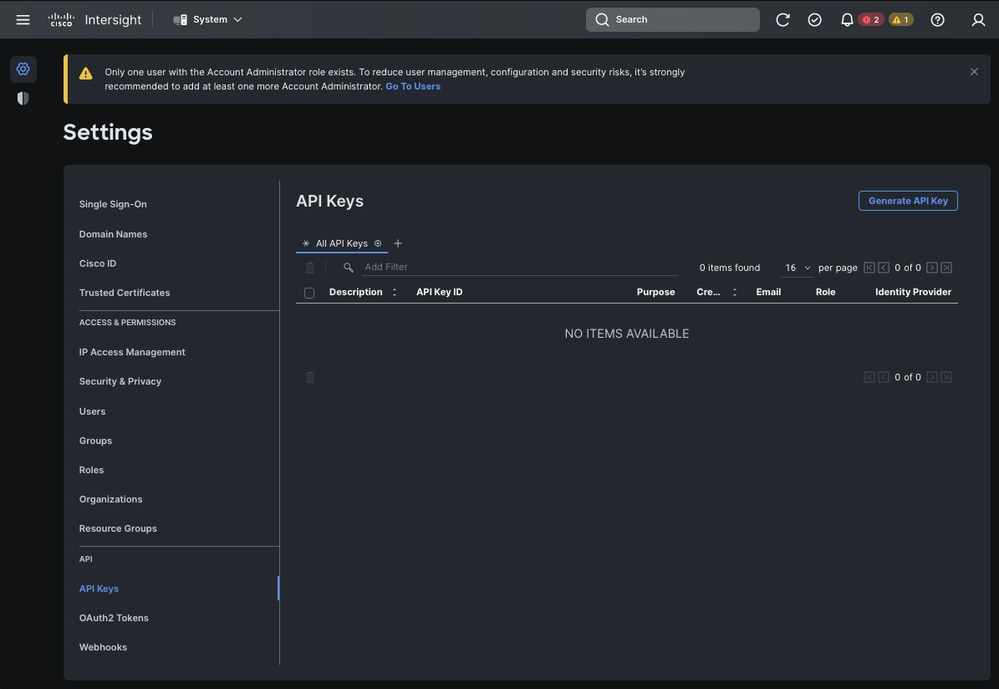
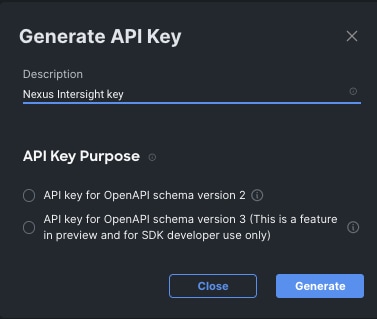
inventory.yaml Nexusansible_connection 스위치로 명령을 전송하기 위해ansible.netcommon.network_cli 유형이 로 설정됩니다. NXAPI를 통한 연결을 허용하기 위해 이를ansible.netcommon.httpapi 로 변경할 수 있습니다. - Intersight 엔드포인트에 연결할 수 있으려면 intersight.com 계정에서 생성할 수 있는 API 키가 필요합니다.
Nexus NXAPI 구성(사용 중인 경우에만 사용ansible.netcommon.httpapi)
참고: 시스템 레벨 프록시가 구성되어 있고(HTTP(S)_PROXY) Ansible이 Nexus NXAPI 엔드포인트와 연결하기 위해 프록시를 사용하지 않아야 하는 경우 (기본값은 Trueansible_httpapi_use_proxy: False임) 설정하는 것이 좋습니다.
# configure terminal # cfeature nxapi # nxapi port 80 # no nxapi https port 443 # end # show nxapi nxapi enabled NXAPI timeout 10 NXAPI cmd timeout 300 HTTP Listen on port 80 HTTPS Listen on port 443 Certificate Information: Issuer: issuer=C = US, ST = CA, L = San Jose, O = Cisco Systems Inc., OU = dcnxos, CN = nxos Expires: Feb 10 22:30:38 2024 GMT
NXAPI 엔드포인트에 대한 HTTP 연결을 독립적으로 확인하려면 를 전송하려고 시도할 수 show clock 있습니다. 다음 예에서는 스위치에서 기본 인증을 사용하여 클라이언트를 인증합니다. X.509 사용자 인증서를 기반으로 클라이언트를 인증하도록 NXAPI 서버를 구성할 수도 있습니다.
참고: 기본 인증 해시는 base64 인코딩 username:password에서 가져옵니다. 이 예에서는 admin:cisco!123 base64 인코딩이 YWRtaW46Y2lzY28hMTIz됩니다.
curl -v --noproxy '*' \ --location 'http://10.1.1.3:80/ins' \ --header 'Content-Type: application/json' \ --header 'Authorization: Basic YWRtaW46Y2lzY28hMTIz' \ --data '{ "ins_api": { "version": "1.0", "type": "cli_show", "chunk": "0", "sid": "sid", "input": "show clock", "output_format": "json" } }'
통화 응답:
* Trying 10.1.1.3... * TCP_NODELAY set * Connected to 10.1.1.3 (10.1.1.3) port 80 (#0) > POST /ins HTTP/1.1 > Host: 10.1.1.3 > User-Agent: curl/7.61.1 > Accept: */* > Content-Type: application/json > Authorization: Basic YWRtaW56Y2lzY28hBNIz > Content-Length: 297 > * upload completely sent off: 297 out of 297 bytes < HTTP/1.1 200 OK < Server: nginx/1.19.6 < Date: Fri, 09 Feb 2024 23:17:10 GMT < Content-Type: text/json; charset=UTF-8 < Transfer-Encoding: chunked < Connection: keep-alive < Set-Cookie: nxapi_auth=dzqnf:xRYwR0l1Tra64VfOMVuD4oI4=; Secure; HttpOnly; < anticsrf: /i3vzCvxhOr4w2IrKP+umbDnzHQ= < Strict-Transport-Security: max-age=31536000; includeSubDomains < X-Frame-Options: SAMEORIGIN < X-Content-Type-Options: nosniff < Content-Security-Policy: block-all-mixed-content; base-uri 'self'; default-src 'self'; script-src 'self' 'nonce-zHx12KP1tervan1s6lrFQz7N6PF0rh'; style-src 'self' 'nonce-zHx12KP1tervan1s6lrFQz7N6P40rh'; img-src 'self'; connect-src 'self'; font-src 'self'; object-src 'self'; media-src 'self'; form-action 'self'; frame-ancestors 'self'; < { "ins_api": { "type": "cli_show", "version": "1.0", "sid": "eoc", "outputs": { "output": { "input": "show clock", "msg": "Success", "code": "200", "body": { "simple_time": "23:17:10.814 UTC Fri Feb 09 2024\n", "time_source": "NTP" } } } } * Connection #0 to host 10.1.1.3 left intact }%
Intersight API 키 생성
에서 API 키를 가져오는 방법에 대해서는 README.md 섹션을 Intersight System > Settings > API keys > Generate API Key 참조하십시오.
예: Ansible inventory.yaml
참고: 다음 예에서는 운영 체제 프록시 설정을 무시하도록 ansible을 ansible_httpapi_use_proxy: False 구성했습니다. Ansible 서버에서 스위치에 연결하기 위해 프록시를 사용해야 하는 경우 해당 컨피그레이션을 제거하거나 True(기본값)로 설정할 수 있습니다.
참고: API 키 ID는 문자열입니다. API 개인 키에는 개인 키가 포함된 파일의 전체 경로가 포함됩니다. 프로덕션 환경에서는 Ansible Vault를 사용하는 것이 좋습니다.
---
all:
hosts:
switch1:
ansible_host: "10.1.1.3"
intersight_src: "mgmt0"
intersight_vrf: "management"
vars:
ansible_user: "admin"
ansible_password: "cisco!123"
ansible_connection: ansible.netcommon.network_cli
ansible_network_os: cisco.nxos.nxos
ansible_httpapi_use_proxy: False
remote_tmp: "/bootflash"
proxy_env:
- no_proxy: "10.1.1.3/24"
intersight_proxy_host: 'proxy.cisco.com'
intersight_proxy_port: '80'
api_key_id: "5fcb99d97564612d33fdfcal/5fcb99d97564612d33fdf1b2/65c6c09d756461330198ce7e"
api_private_key: "/home/admin/ansible-intersight-nxos/my_intersight_private_key.txt"
...
예: playbook.yaml Execution
Ansible을 사용하여 독립형 Nexus 디바이스를 프로그래밍하는 방법에 대한 자세한 내용은 현재 릴리스의Applications/Using Ansible Cisco Nexus 9000 Series NX-OS Programmability Guide에서 Cisco NX-OS를 사용하여 섹션을 참조하십시오.
❯ ansible-playbook -i inventory.yaml playbook.yaml PLAY [all] ********************************************************************************************************************************************************* TASK [Enable feature intersight] *********************************************************************************************************************************** [WARNING]: To ensure idempotency and correct diff the input configuration lines should be similar to how they appear if present in the running configuration on device changed: [switch1] TASK [Configure proxy] ********************************************************************************************************************************************* ok: [switch1] TASK [Unconfigure proxy] ******************************************************************************************************************************************* skipping: [switch1] TASK [Configure src interface] ************************************************************************************************************************************* ok: [switch1] TASK [Unconfigure src interface] *********************************************************************************************************************************** skipping: [switch1] TASK [Configure src vrf] ******************************************************************************************************************************************* ok: [switch1] TASK [Unconfigure src vrf] ***************************************************************************************************************************************** skipping: [switch1] TASK [Await connection to Intersight] ****************************************************************************************************************************** FAILED - RETRYING: [switch1]: Await connection to Intersight (10 retries left). FAILED - RETRYING: [switch1]: Await connection to Intersight (9 retries left). FAILED - RETRYING: [switch1]: Await connection to Intersight (8 retries left). FAILED - RETRYING: [switch1]: Await connection to Intersight (7 retries left). FAILED - RETRYING: [switch1]: Await connection to Intersight (6 retries left). FAILED - RETRYING: [switch1]: Await connection to Intersight (5 retries left). FAILED - RETRYING: [switch1]: Await connection to Intersight (4 retries left). ok: [switch1] TASK [Get show system device-connector claim-info] ***************************************************************************************************************** ok: [switch1] TASK [Set claiminfoDict] ******************************************************************************************************************************************* ok: [switch1] => (item=SerialNumber: FDO21112E2L) ok: [switch1] => (item= SecurityToken: 0A70886FE1B8) ok: [switch1] => (item= Duration: 599) ok: [switch1] => (item= Message: ) ok: [switch1] => (item= Claim state: Not Claimed) TASK [claim device - PROXY] **************************************************************************************************************************************** skipping: [switch1] TASK [claim device - NO PROXY] ************************************************************************************************************************************* changed: [switch1] PLAY RECAP ********************************************************************************************************************************************************* switch1 : ok=8 changed=2 unreachable=0 failed=0 skipped=4 rescued=0 ignored=0
다음을 확인합니다.
새 대상의 주장을 확인하려면 다음을 수행합니다.
Nexus 스위치에서
10.3(4a)M 이전 릴리스
# run bash sudo cat /mnt/pss/connector.db
Nexus# run bash sudo cat /mnt/pss/connector.db { "AccountOwnershipState": "Claimed", "AccountOwnershipUser": "[email protected]", "AccountOwnershipTime": "2024-04-25T22:37:25.173Z", "AccountOwnershipId": "TAC-DCRS", "DomainGroupMoid": "6620503275646133014ec978", "AccountMoid": "6620503275646133014ec977", "CloudDns": "svc.ucs-connect.com", "CloudDnsList": [ "svc.intersight.com", "svc-static1.intersight.com", "svc.ucs-connect.com", "svc-static1.ucs-connect.com" ], "CloudCert": "", "UserCloudCerts": {}, "Identity": "662adb256f72613901e8bc19", "AccessKeyId": "98facfdbf3855bcfd340f2bbb0c388f8", "AccessKey": "", "PrivateAccessKey": "-----BEGIN RSA PRIVATE KEY----- -CUT- 5Do\nD18Ta5YvuIYFLZrYlHLyCDOhS5035AUEGNtEceiPhQjOCvRumyJD\n-----END RSA PRIVATE KEY-----\n", "CloudEnabled": true, "ReadOnlyMode": false, "LocalConfigLockout": false, "TunneledKVM": false, "HttpProxy": { "ProxyHost": "proxy.cisco.com", "ProxyPort": 8080, "Preference": 0, "ProxyType": "Manual", "Targets": [ { "ProxyHost": "proxy.cisco.com", "ProxyPort": 8080, "Preference": 0 } ] }, "LogLevel": "info", "DbVersion": 1, "AutoUpgradeAdminState": "Automatic"
10.3(4a)M으로 시작하는 릴리스
# show system device-connector claim-info
N9k-Leaf-2# show system device-connector claim-info SerialNumber: FDO23021ZUJ SecurityToken: Duration: 0 Message: Cannot fetch claim code for already claimed device Claim state: Claimed Claim time: 2024-02-09T15:38:57.561Z Claimed by: [email protected] Account: ACI-DCRS-TAC Site name: Site ID:
# show system internal intersight info
# show system internal intersight info Intersight connector.db Info: ConnectionState :Connected ConnectionStateQual : AccountOwnershipState :Claimed AccountOwnershipUser :[email protected] AccountOwnershipTime :2024-02-09T15:38:57.561Z AccountOwnershipId :ACI-DCRS-TAC DomainGroupMoid :5eb2e1e47565612d3079fe9a AccountMoid :5eb2e1e47565612d3079fe92 CloudDns :svc.ucs-connect.com CloudDnsList: 1. :svc.ucs-connect.com 2. :svc.intersight.com 3. :svc-static1.intersight.com 4. :svc-static1.ucs-connect.com Identity :65c647116f72513501e75530 CloudEnabled :true ReadOnlyMode :false LocalConfigLockout :false TunneledKVM :false HttpProxy: ProxyHost :proxy.cisco.com ProxyPort :8080 Preferenc :0 ProxyType :Manual Target[1]: ProxyHost :proxy.cisco.com ProxyPort :8080 Preference :0 LogLevel :info DbVersion :1 AutoUpgradeAdminState :Automatic
앤서블
스위치 인터사이트 정보를 획득하기 위해, 의playbook.yaml 끝에 태스크를 추가하는 것이 가능하다.
- name: Get intersight info nxos_command: commands: - show system internal intersight info register: intersightInfo_claimed retries: 10 delay: 10 until: intersightInfo.stdout is search("Connecte") - name: Display intersight info vars: msg: |- output from {{ inventory_hostname }}: {{ intersightInfo_claimed.stdout | join("") }} debug: msg: "{{ msg.split('\n') }}"
다음은 해당 출력입니다.
TASK [Get intersight info] *************************************************************************************************** ok: [switch1] TASK [Display intersight info] *********************************************************************************************** ok: [switch1] => { "msg": [ "output from switch1:", "Intersight connector.db Info:", "ConnectionState :Connected", "ConnectionStateQual :", "AccountOwnershipState :Claimed", "AccountOwnershipUser :[email protected]", "AccountOwnershipTime :2024-02-10T01:00:28.516Z", "AccountOwnershipId :vricci", "DomainGroupMoid :5fcb98d97565612d33fdf1ae", "AccountMoid :5fcb98d97565612d33fdf1ac", "CloudDns :svc.intersight.com", "CloudDnsList: ", " 1. :svc.intersight.com", " 2. :svc-static1.intersight.com", " 3. :svc.ucs-connect.com", " 4. :svc-static1.ucs-connect.com", "Identity :65c6caac6f72613901f841c1", "CloudEnabled :true", "ReadOnlyMode :false", "LocalConfigLockout :false", "TunneledKVM :false", "HttpProxy: ", " ProxyHost :proxy.cisco.com", " ProxyPort :80", " Preferenc :0", " ProxyType :Manual", " Target[1]: ", " ProxyHost :proxy.cisco.com", " ProxyPort :80", " Preference :0", "LogLevel :info", "DbVersion :1", "AutoUpgradeAdminState :Automatic" ] }
장치 커넥터 사용 안 함
명령 또는 작업
목적
1단계
기능 가시성 없음
예:
switch(config)# no feature intersight
intersight 프로세스를 비활성화하고 모든 NXDC 컨피그레이션 및 로그 저장소를 제거합니다.
개정 이력
| 개정 | 게시 날짜 | 의견 |
|---|---|---|
3.0 |
15-May-2024 |
NXOS 디바이스를 수동으로 청구하기 위한 Quickstart 비디오 추가 |
2.0 |
02-Apr-2024 |
"Disable Device Connector(디바이스 커넥터 비활성화)" 섹션이 추가되었습니다. |
1.0 |
22-Feb-2024 |
최초 릴리스 |
 피드백
피드백